About Us
Features
Pricing
Contact Us
Blogs
Login
Food Photography Made Easy: Take Great Photos with Your Phone
How I take delicious food photos at home with just my phone.
Whether you’re a home cook, baker, or restaurant owner—this guide is for you.
If you're like me—preparing and selling food from home or running a small food business—you know how powerful a good photo can be. A great picture doesn’t just make your food look tempting; it helps attract more customers, especially when you’re using tools like a 3D menu.
The best part? You don’t need a fancy camera or a studio. I use my phone and follow a few simple tricks to make my food photos look clean, professional, and mouth-watering.
1. I Start by Prepping the Food Neatly
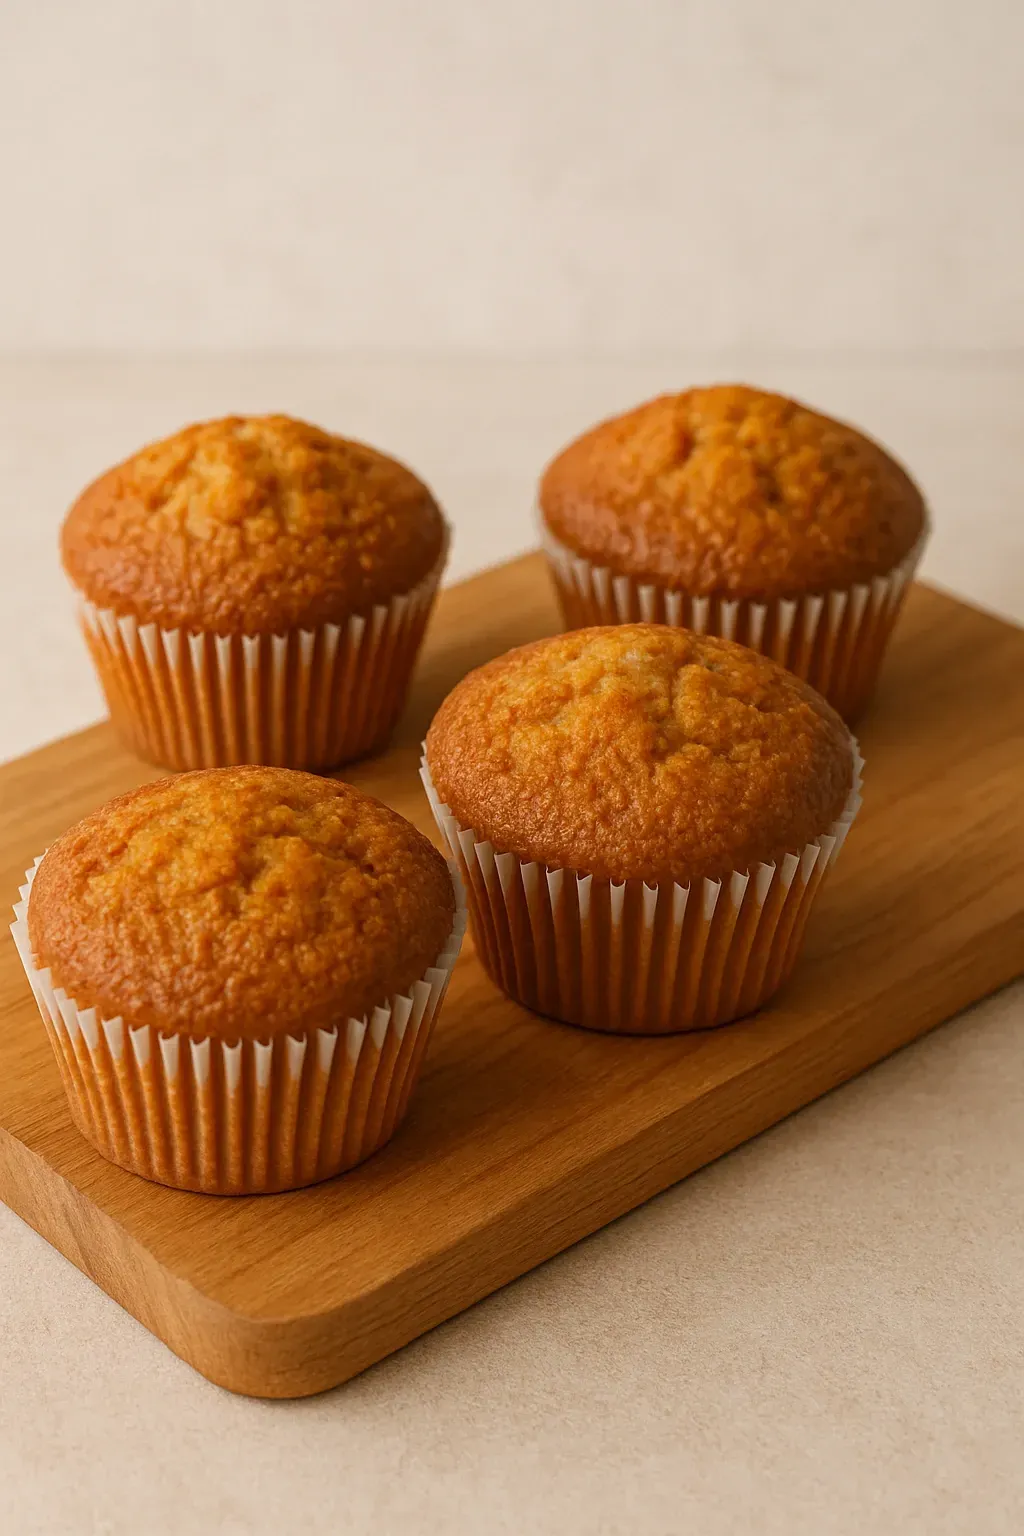
Neatly arranged cupcake on a wooden board with garnishing
Presentation makes a big difference. I make sure the baked goods are fresh and thoughtfully arranged. I keep the plate or surface clean and avoid overcrowding.
For example, when I shoot cupcakes, I place them on a rustic wooden board with a side of berries or a swirl of cream to enhance the scene. It instantly makes the image more inviting and “shop-ready.”
2. Natural Light Is My Best Friend
Food near a window with soft daylight
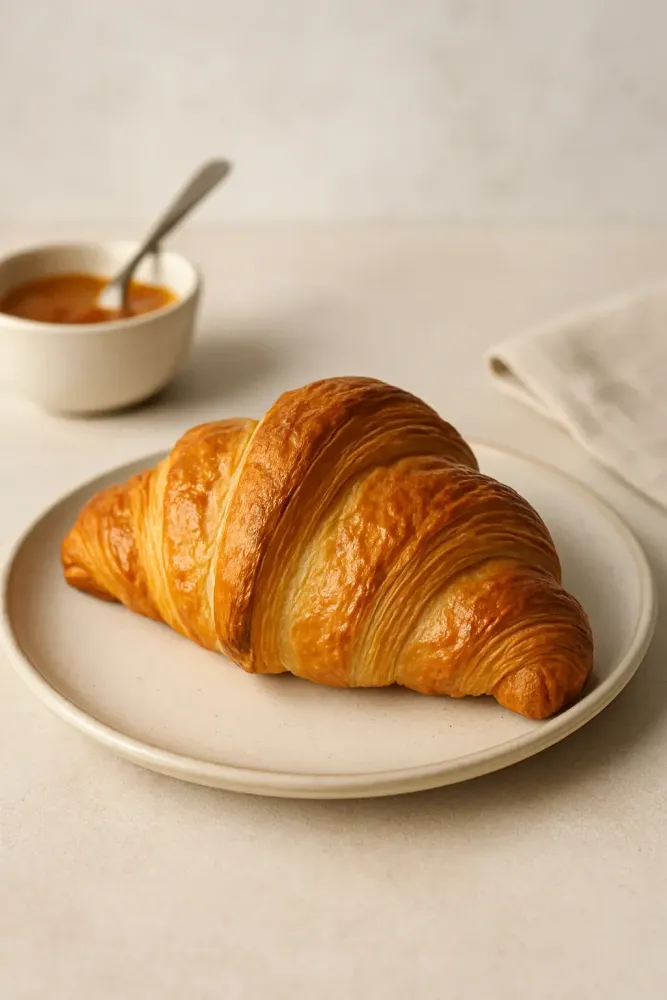
Lighting changes everything. I always take photos near a window during the day—and I never use flash. Natural light makes the texture pop.
To soften harsh shadows, I sometimes place a white paper or cloth on the opposite side of the window. This gives the photo a soft, even glow—perfect for showing off details like flaky croissants or gooey brownies.
3. Simple Backgrounds Keep the Focus on the Food
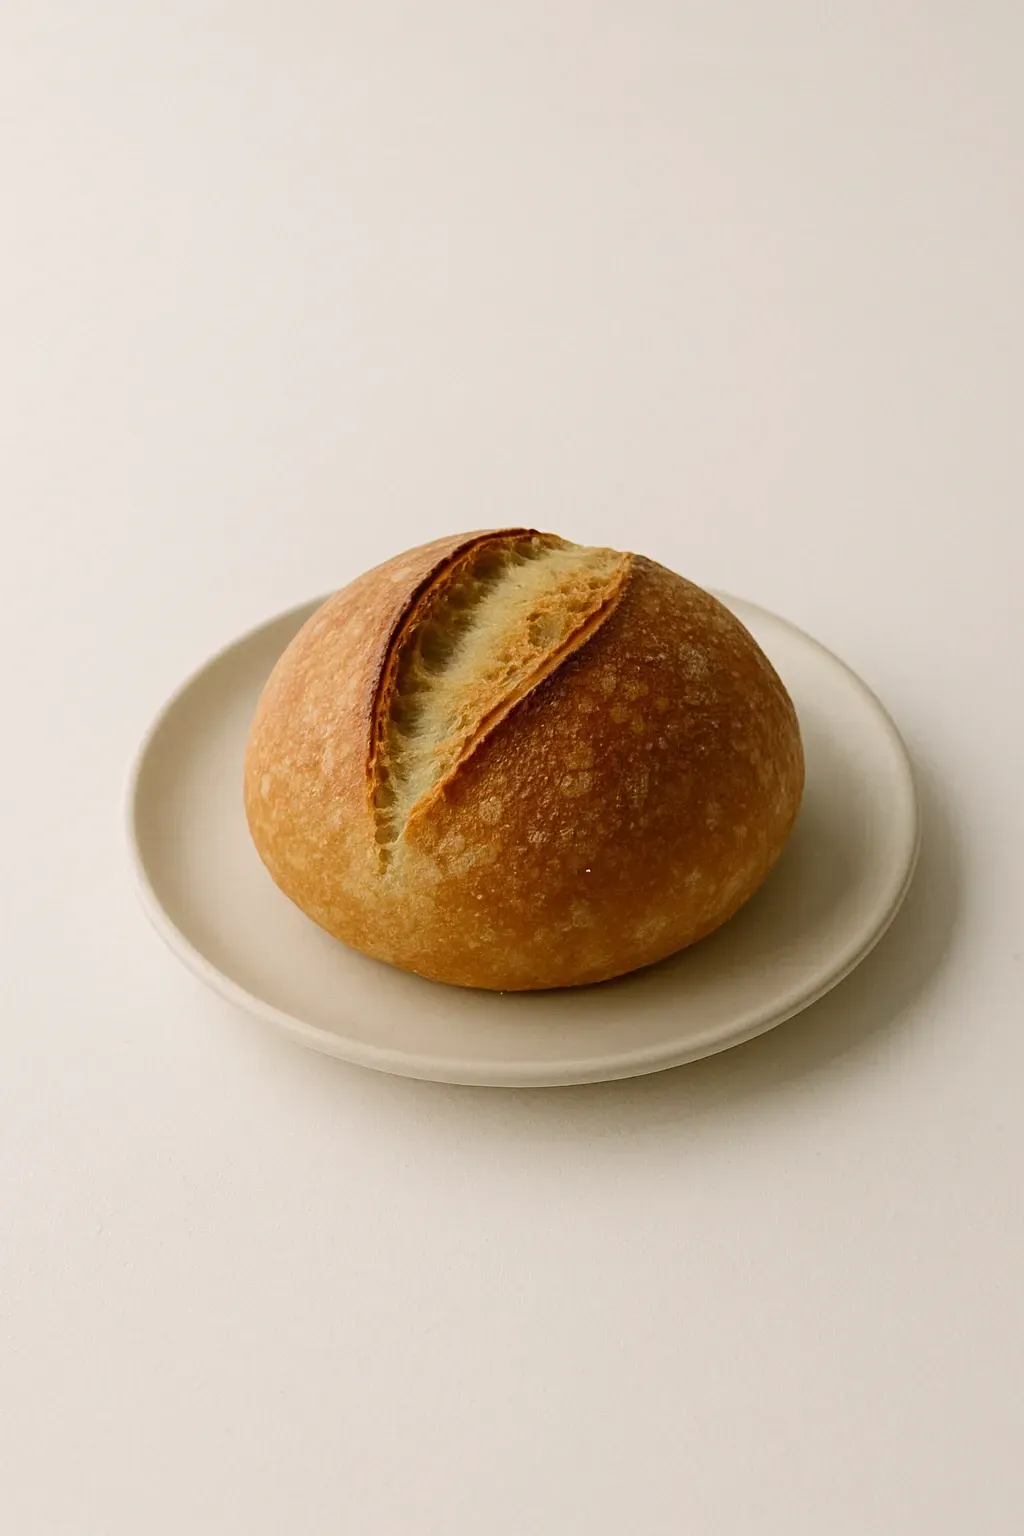
Food on a plain white or wooden surface
I’ve learned that less is more. Busy backgrounds take attention away from the food. So I stick to simple setups—white plates, wooden tables, clean countertops, or a neutral baking sheet.
It keeps the focus exactly where it should be—on the delicious treat in front of the camera.
4. My Phone Does All the Work
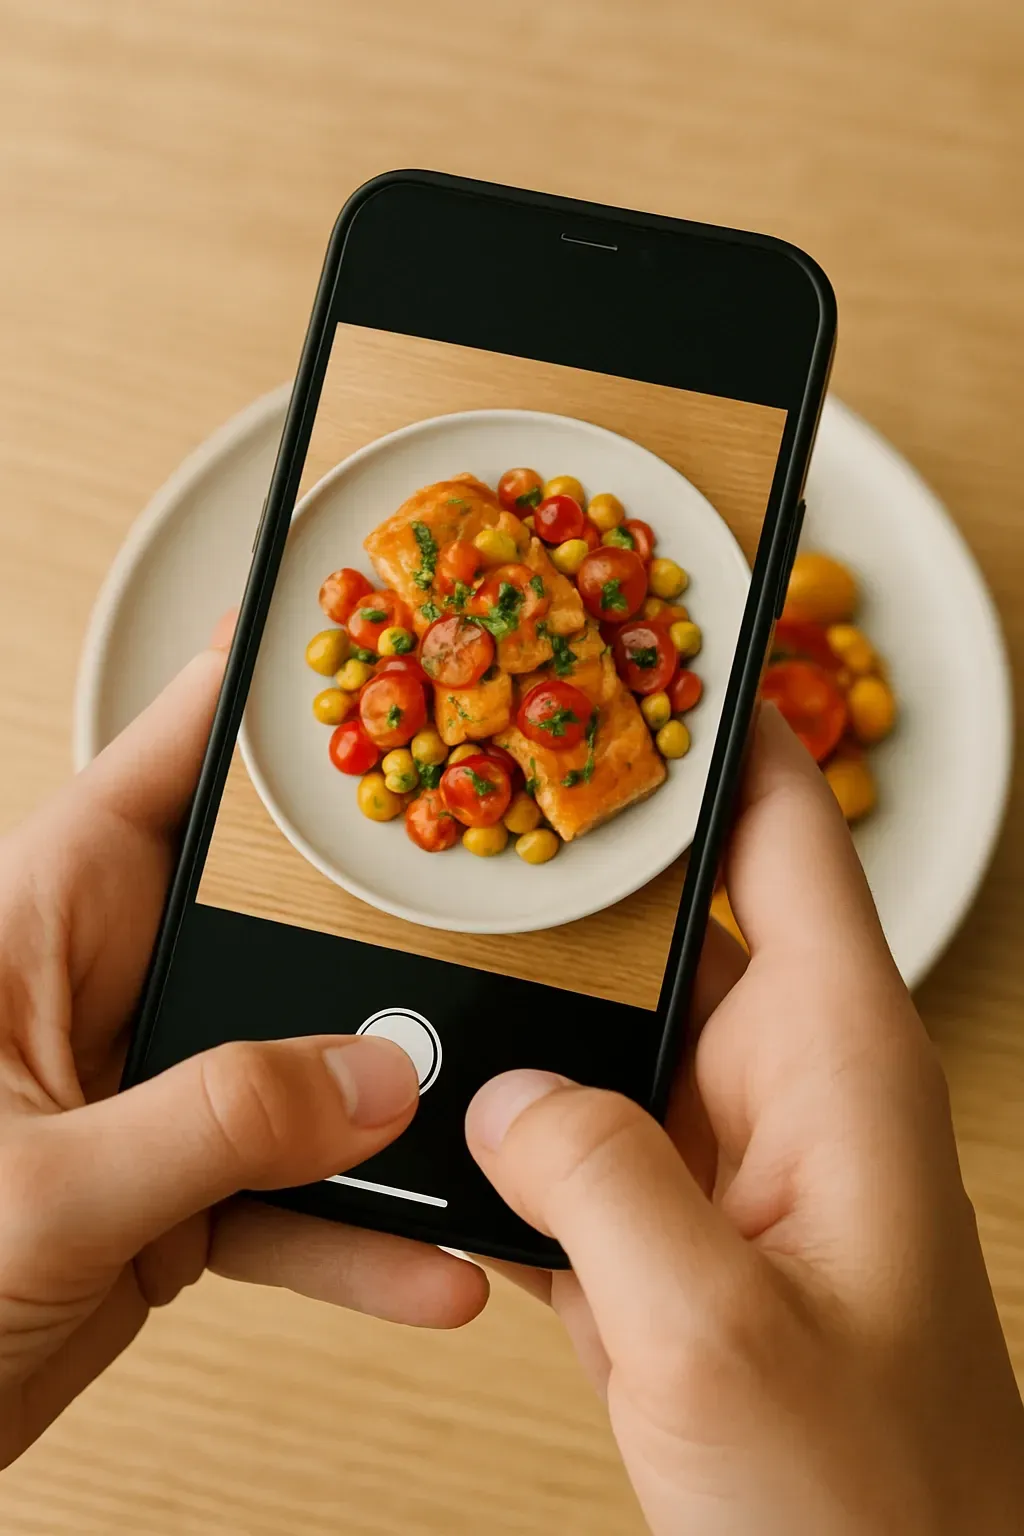
Phone camera capturing a dish from a top angle
I don’t use a DSLR. I rely entirely on my phone—and it’s more than enough.
I usually shoot in Portrait or standard Photo mode, tap on the main subject to lock focus, and avoid zooming in (instead, I just move closer). I take multiple shots from top-down, 45-degree, and side angles to find the most mouthwatering view.
5. Props Help—In Small Doses
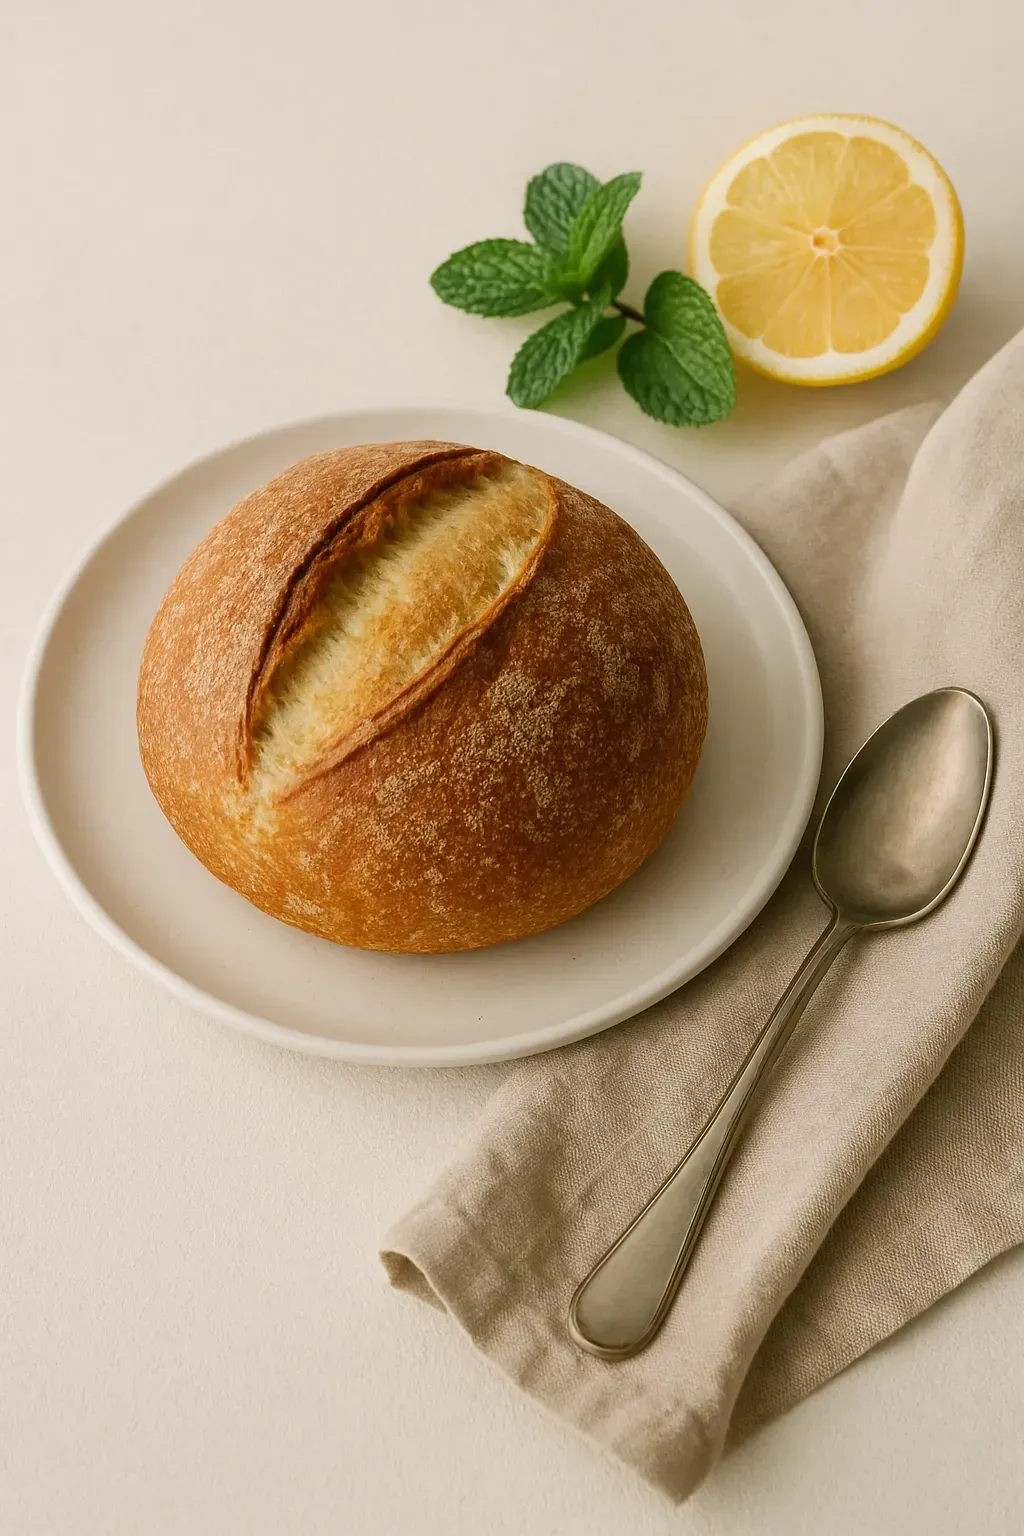
Bakery item with a spoon, napkin, or fresh ingredients like mint or lemon
Props add personality, but I use them sparingly. I might add a dessert spoon, a linen napkin, or a sprinkle of powdered sugar. Sometimes I use fresh fruits or herbs for a splash of color.
These little touches give context and style without overwhelming the scene.
6. Clean Surroundings Are Key
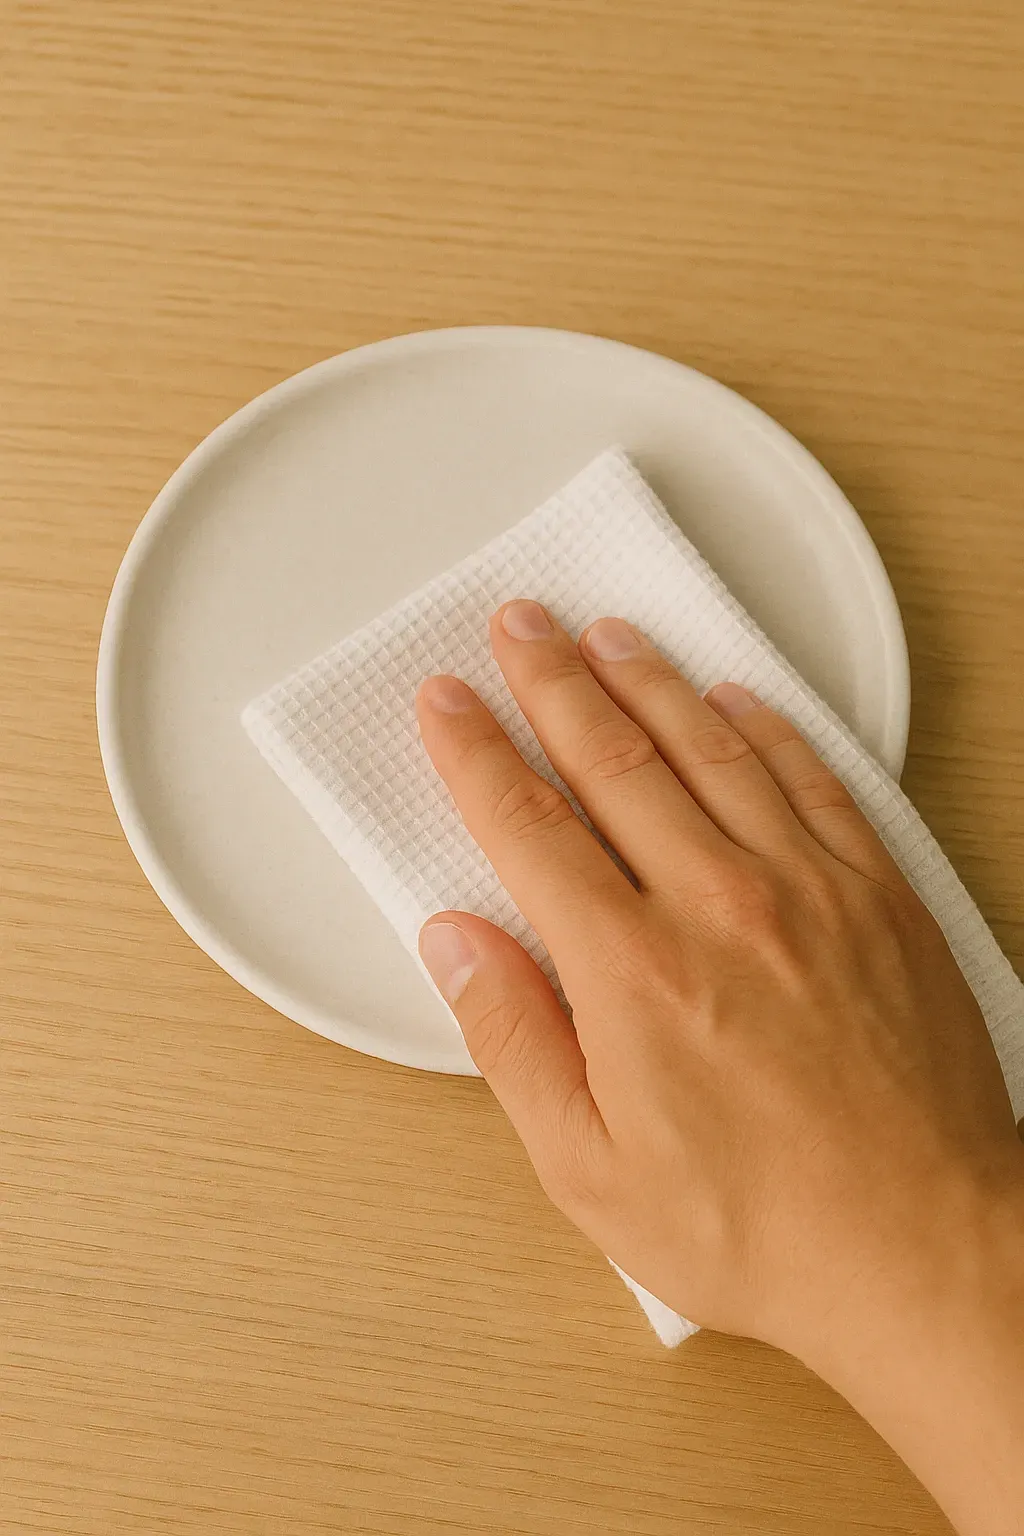
Cleaning the plate before a food photo
Before I hit the shutter, I check for smudges, crumbs, and spills. I wipe the edges of plates and clean the surface.
Even the tastiest pastry can look unappealing if the setting is messy. Clean visuals make a huge impact on the final result.
7. I Edit Lightly (But Never Overdo It)
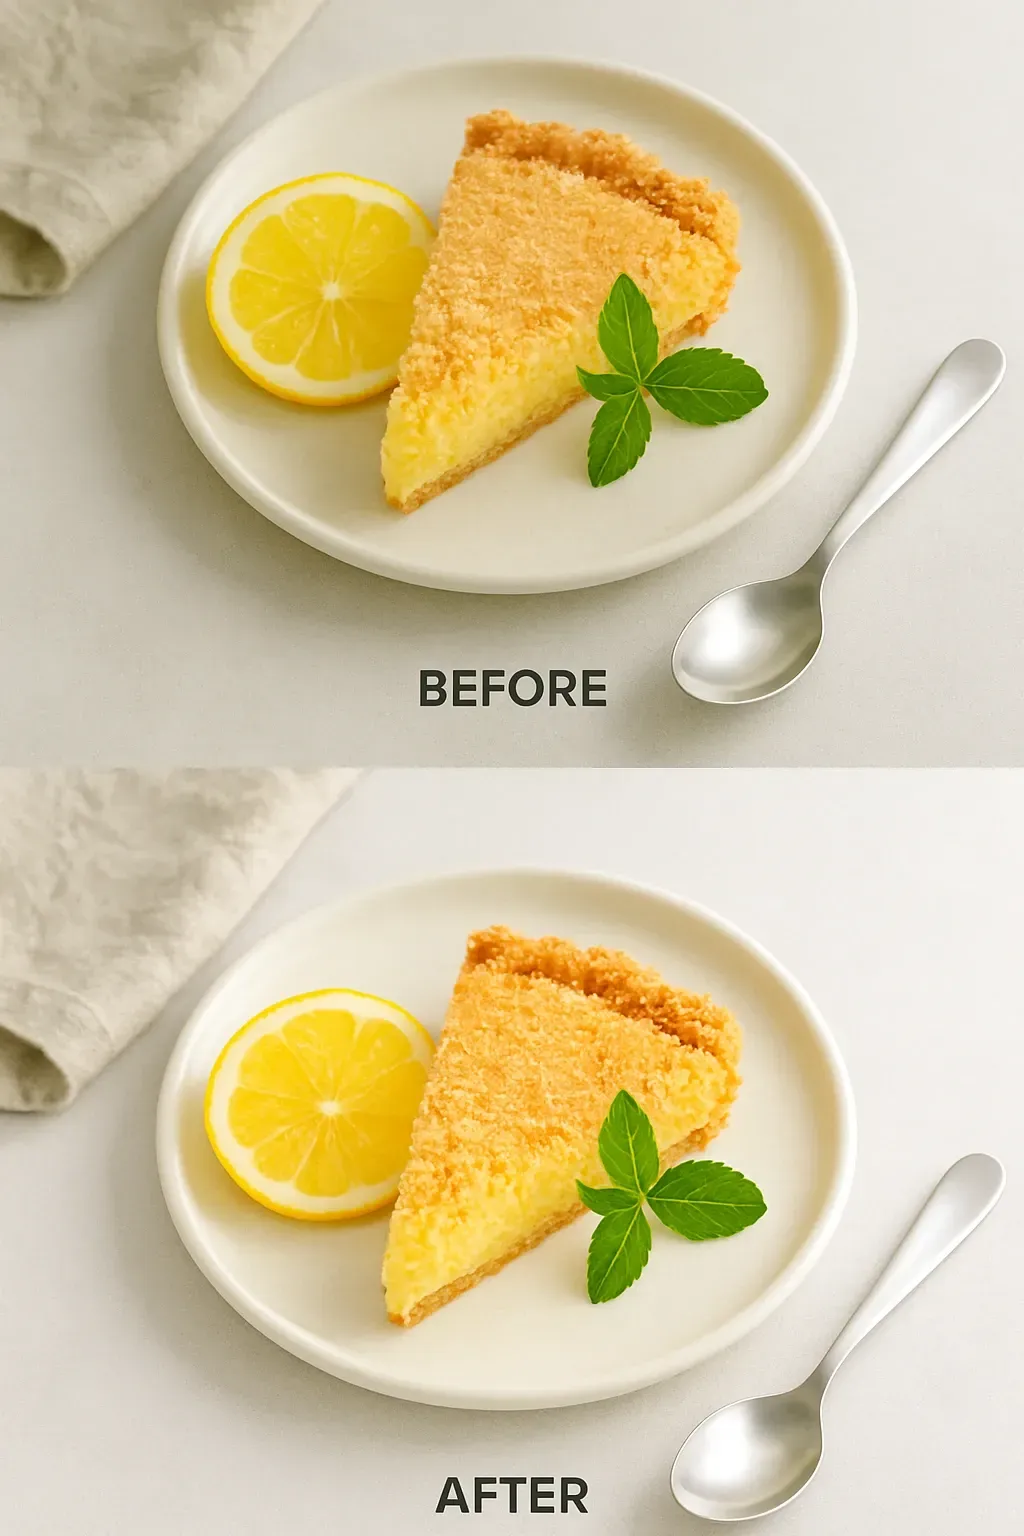
Before and after of a food image with slight brightness and sharpness edits
Once the photo is taken, I make small adjustments. I might increase the brightness and sharpness using the phone’s built-in tools. But I avoid heavy filters—they can distort colors and make the food look fake.
My goal is to show the real dish, just slightly polished.
I Practice—And It’s Paying Off
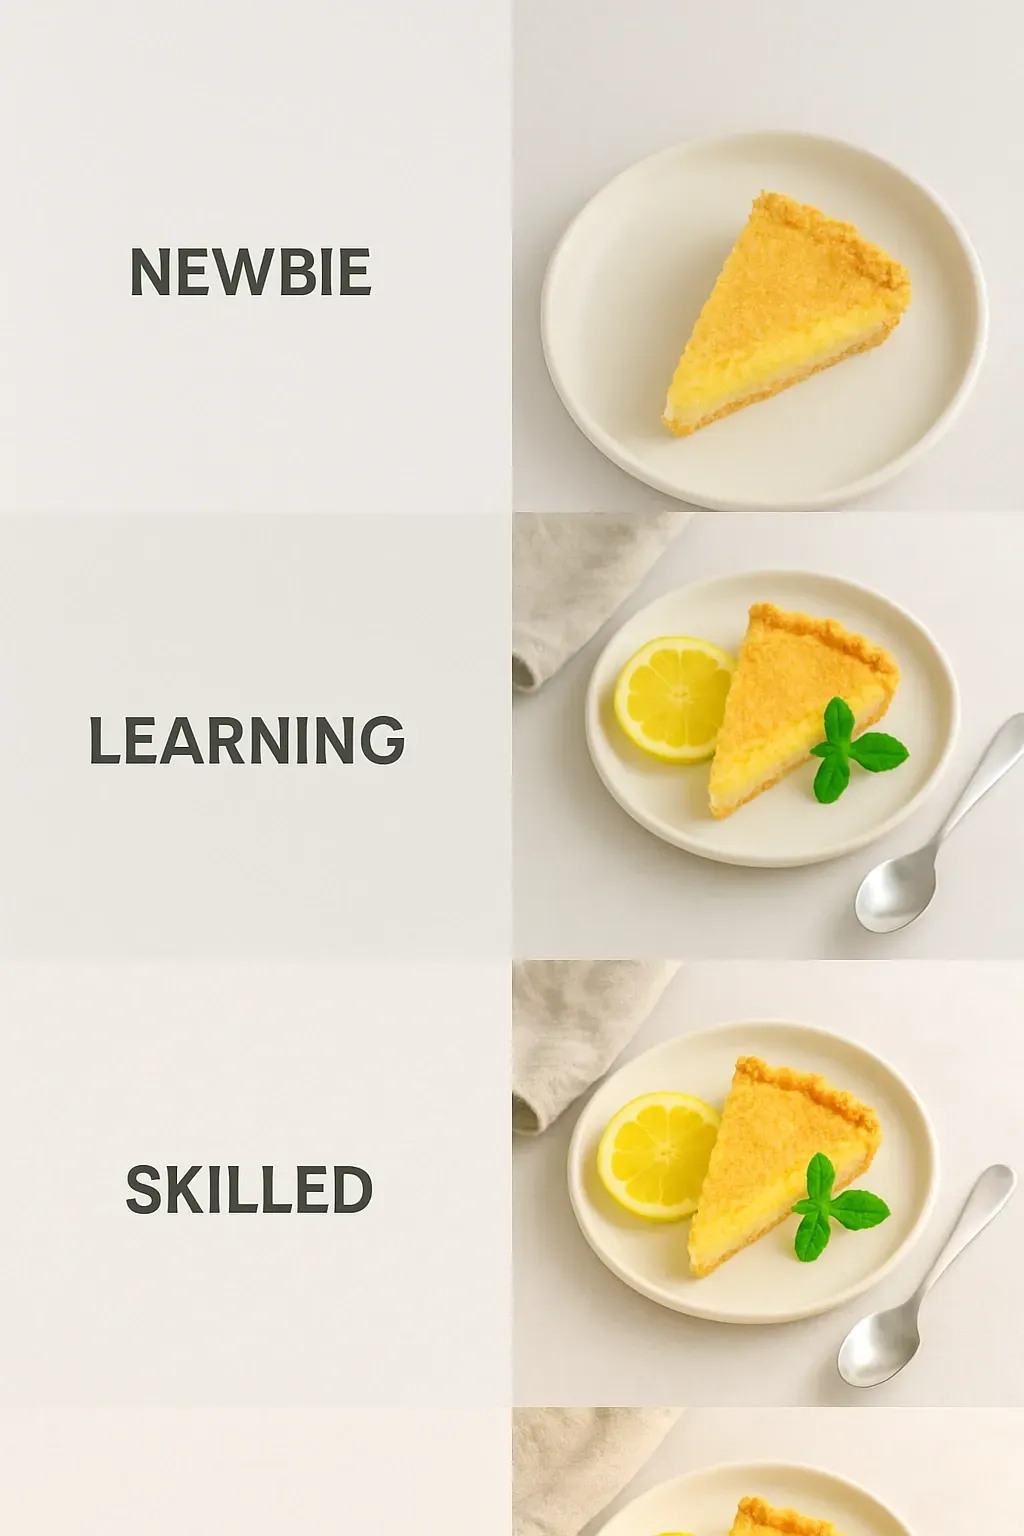
A photo collage of improving food pictures over time
When I first started taking food photos, they were… okay. But after a few sessions, I started to notice what lighting worked, which angles looked best, and how to make even a simple muffin look like a magazine cover.
Practice has helped me tell better stories with my food.
Need Help?
Not everyone loves food photography—and that’s completely fine.
If you'd rather leave it to a professional, here’s what you can do:
✅ Hire a local food photographer
✅ Or contact the PREST team—we’ll guide you or connect you with someone who can make your menu shine
✅ Let’s Show Off Your Delicious Food
Your food already tastes amazing—now let’s help it look amazing too. With a few simple tips, you can turn your kitchen or bakery into a mini studio.
Sometimes, just one great photo is enough to turn a viewer into a paying customer.
📍 Learn more at www.get-prest.com
See More


© 2025, PREST, Inc. All rights reserved. | Designed in 🇮🇳 ![]()
Crafted by ![]()